The short answer
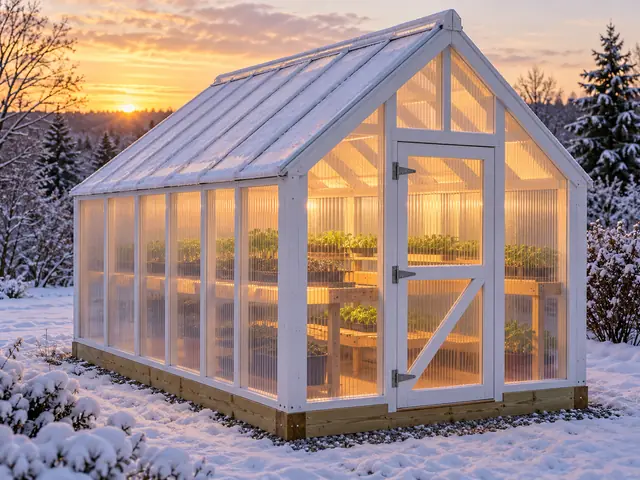
To build a greenhouse, choose a level, sunny, well-drained spot and check the permit, then build in six steps: a squared and anchored base, framed walls, the roof frame, the door and benches, the polycarbonate, and the vents. Our 8x12 plan takes 46 to 66 hours for one handy person with a helper, and its materials come to $3,813.80 at the store prices we read.
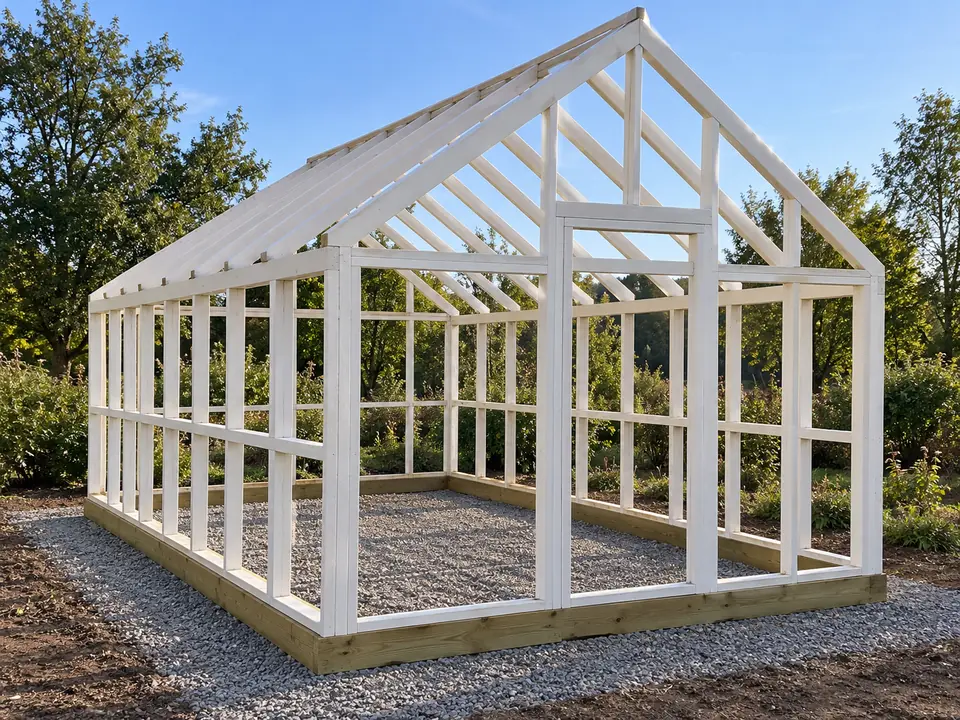
How to build a greenhouse comes down to six jobs done in the right order: a square, anchored base; framed walls; the roof frame; the door and benches; the polycarbonate; and the vents. This guide follows the build sequence of our plans, which is the same for every size the greenhouse designer draws, and gives the numbers that decide each step. The worked example is our 8x12 gable in 8 mm twin-wall polycarbonate: $3,813.80 in priced materials and 46 to 66 hours of work.
If you would rather start from a drawing than from a blank page, the free greenhouse plans show every size we draw, from 6x8 to 12x20, with their materials, and each one opens in the designer to change.
Before you build
Pick the size
Size is the decision you cannot undo. Clemson1 Extension suggests at least 6 x 10 ft for a lean-to and 8 x 12 ft for a freestanding greenhouse, and UGA2 Extension says to build 25 to 50% larger than you first think you need, because a greenhouse fills up. UGA also advises picking the widest house you can afford, since length is easy to add later and width is not. Clemson adds a reason small houses are harder to run: they swing in temperature faster, because the exposed area is large compared with the air inside.
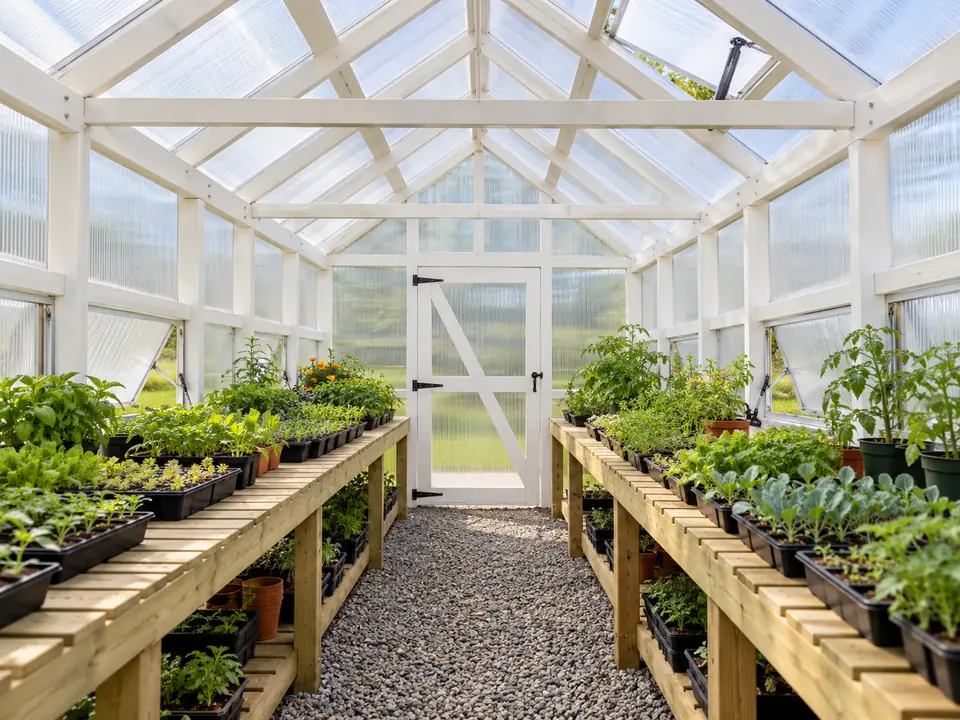
A practical layout is two side benches and an aisle. UGA2 puts bench height at about 36 in and says a walk used only to stand at the benches can be 18 to 19 in, while 24 to 30 in lets people pass. Our 8x12 has two 24 in benches with a 96 sq ft floor, and the designer checks the aisle and bench depth for any size you type.
| Plan | Floor | Glazing | Priced materials | Gravel (estimate) | Labor if hired |
|---|---|---|---|---|---|
| 6x8 greenhouse | 48 sq ft | 8 mm twin-wall | $2,330.48 | $30 to $110 | $1,400 to $4,100 |
| 8x8 greenhouse | 64 sq ft | 8 mm twin-wall | $2,712.99 | $40 to $137 | $1,750 to $5,100 |
| 8x12 greenhouse | 96 sq ft | 8 mm twin-wall | $3,813.80 | $56 to $186 | $2,300 to $6,600 |
| 8x16 greenhouse | 128 sq ft | 8 mm twin-wall | $4,522.27 | $76 to $254 | $2,700 to $7,900 |
| 10x12 greenhouse | 120 sq ft | 8 mm twin-wall | $4,094.42 | $69 to $232 | $2,600 to $7,500 |
| 10x16 greenhouse | 160 sq ft | 8 mm twin-wall | $4,831.61 | $92 to $304 | $3,450 to $9,900 |
| 12x20 greenhouse | 240 sq ft | 8 mm twin-wall | $6,504.94 | $131 to $426 | $4,600 to $13,300 |
| 6x12 lean-to greenhouse | 72 sq ft | 8 mm twin-wall | $2,765.96 | $47 to $159 | $1,700 to $5,000 |
| 8x12 lean-to greenhouse | 96 sq ft | 8 mm twin-wall | $3,203.60 | $56 to $186 | $2,250 to $6,500 |
| 8x12 corrugated greenhouse | 96 sq ft | Corrugated | $2,852.73 | $56 to $186 | $2,300 to $6,600 |
| 6x16 lean-to greenhouse | 96 sq ft | 8 mm twin-wall | $3,297.67 | $60 to $205 | $2,100 to $6,000 |
Pick the spot
UGA2 Extension ranks the sides of a house: south or southeast is best, then east, then southwest and west, with north the least desirable. Orientation is where sources disagree. UGA says a house running lengthwise north to south gets less shade and more winter light, while NRAES3, writing about commercial houses, says that above 40 degrees North the ridge should run east to west for the most winter sun. Oklahoma4 State adds that shelter from wind may matter more than either. Pick a level, well-drained spot clear of winter shade, with room to walk all round.
Gable or lean-to
A freestanding gable house gets light from every side and air through both roof slopes. A lean-to borrows one wall from the house: UGA2 describes it as one or two rows of benches in a total width of 7 to 12 ft, as long as the wall it leans on, but with limited ventilation and temperature control. Oklahoma4 State found the lowest total cost in a 7 to 12 ft lean-to, and the lowest cost per square foot in a 17 to 18 ft wide freestanding house with a wide center bench. In money terms, our 6x12 lean-to comes to $2,765.96 in materials against $3,813.80 for the 8x12 gable. A lean-to also needs a sound wall facing south or close to it, and the ledger has to be fixed and flashed to that wall the way your building department accepts.
Check the rules
The model International Residential Code5 exempts a one-story detached accessory building of 200 sq ft or less from a building permit, but towns can and do set their own limits, and UGA2 Extension says a permit is usually required for a greenhouse. Oklahoma4 State says to check building codes and zoning before you start. Ask three things: whether your size needs a permit, the setback from property lines, and the roof snow load to design for. Call 811 before you dig or drive anchors.
Order the long-lead items first
Twin-wall polycarbonate, its profiles and tapes often ship by freight and can take weeks. Order them before you pour a single bag of gravel, and get a delivered price: freight is not in our totals. The greenhouse cost calculator lists every line with its store and the date we read the price.
Tools and helpers
Nothing on this build needs a specialist tool. Our plans list a circular or miter saw, a drill and driver, metal drill bits sized to the glazing screws and a 1/4 in bit, a speed square, a 25 ft tape, a 4 ft level, a string line, a utility knife, a caulk gun, a ladder, and safety glasses, gloves and hearing protection. Plan on a helper for standing the walls and for every roof sheet: a long sheet is light but awkward, and it has to land square on the rafters the first time.
- 1Clemson HGIC 1704 Clemson HGIC 1704, 06/99
- 2UGA Extension UGA Extension, B 910, 2023-11-17
- 3NRAES-33 NRAES-33, Greenhouse Engineering, 1994
- 4Oklahoma Cooperative Extension Oklahoma Cooperative Extension, HLA-6705, revised 03/2013
- 5International Code Council International Code Council, 2021 International Residential Code, Chapter 3, R317.1.2 (codes.iccsafe.org)
- 6International Code Council International Code Council, 2021 IRC, Chapter 1, R105.2 (codes.iccsafe.org)
Step 1: The base
A greenhouse is light and catches wind, so the base has two jobs: hold the frame level and square, and stop it lifting. Our plans offer three bases:
- Pressure-treated timbers on a compacted gravel bed, the default.
- Concrete blocks on the gravel bed, which lift the frame about 4 in higher.
- Timbers with a framed knee wall, 18 to 36 in high, clad in T1-11.
Any wood in contact with the ground has to be pressure-treated for ground contact (IRC5 R317.1.2), and NRAES3 warns against creosote or pentachlorophenol inside a greenhouse. For the 8x12 the gravel bed is about 2 cu yd and the plan ties the base down with 6 ground anchors. A permanent masonry footing is a different job: NRAES puts footings below frost depth or at least 24 in down, on undisturbed soil.
Check before you cut
Square before anything else
Measure both diagonals of the base. When they are equal within 1/4 in and the base is level, the walls will stand plumb and the sheets will fit. Every error here shows up in the glazing.
- 3NRAES-33 NRAES-33, Greenhouse Engineering, 1994
- 5International Code Council International Code Council, 2021 International Residential Code, Chapter 3, R317.1.2 (codes.iccsafe.org)
- 6International Code Council International Code Council, 2021 IRC, Chapter 1, R105.2 (codes.iccsafe.org)
Step 2: The walls
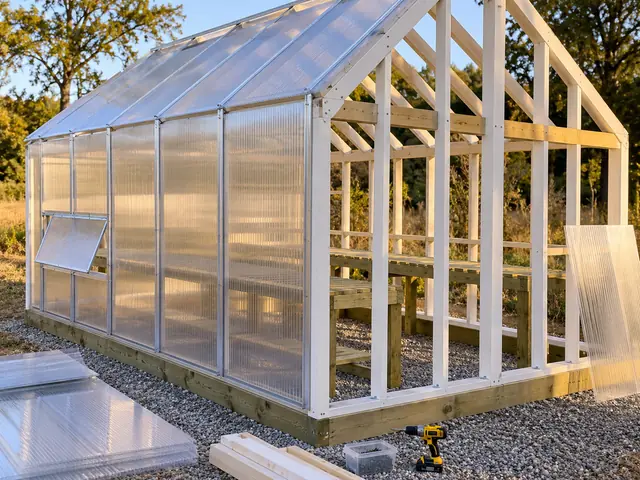
Frame each wall flat on the ground, stand it, plumb and brace it, then screw the corners together and the bottom plates to the base. Our plans space studs and rafters 24 in on center, in line with each other. That spacing is not arbitrary: twin-wall sheets are 48 in wide, so every joint between sheets lands on a stud or a rafter.
The walls also carry girts, the horizontal supports the sheets are screwed to between studs. Their spacing comes from the sheet maker’s tables and the wind exposure you pick. The door end gets a framed rough opening for the site-built door; the side walls get stud bays for vents, above the benches where there is room.
Step 3: The roof frame
Rafters, the ridge board (or a 2x6 ledger on the house wall for a lean-to), ties across every second pair, and purlins between the rafters. The rafter size comes from span tables for the snow load you enter: for the 8x12 at 20 psf it is a 2x4 at 24 in, with supports at most 24 in apart down the slope.
Two rules from the sheet maker shape the roof. Palram’s7 US instructions ask for at least 2 in of rise per 12 in of run and forbid flat roofs, so condensation and rain run off. And Palram says design loads come from local building codes, which is why the designer asks for your roof snow load rather than guessing. NRAES3, citing the greenhouse manufacturers’ association, recommends designing for at least 15 psf of snow and an 80 mph wind.
Paint the frame now, before any sheet goes on. NRAES3 recommends painting wood frames for decay protection and more light, white being best.
Step 4: The door and benches
Hang the door and build the benches while the walls are open and you can still reach in with a saw. In our plans the door is 76 in tall, framed in 2x4 and glazed with the same sheet, on three hinges. The benches stand 32 in high with a 2 in gap to the wall, which lets air move behind them.
Step 5: The glazing
This is the step that decides whether the greenhouse leaks, fogs up or cracks. Fit the walls first, then the roof, starting from the door end. The rules all come from Palram’s7 documents for its SUNLITE twin-wall sheet:
Direction and side
- Flutes run down the slope on the roof and vertical on the walls, so water inside the channels can drain.
- Only one face is UV protected, and it must face out. Keep the protective film on until each sheet is fixed.
Sealing the edges
- Solid tape on the top edge of each sheet, vented tape on the bottom edge, both covered by U profiles.
- Drill 1/4 in weep holes every 8 in in the bottom U profile so water gets out.
- Sheets meet on an H channel on the walls and a two-piece base and cap connector on the roof.
Fixing
- A screw every 12 in along each support, every 8 in where winds are high, with an EPDM washer, snug but not crushing it.
- Pre-drill each hole 2 mm wider than the screw so the sheet can move: Palram gives about 3 mm of growth per metre over a 50 C swing and asks you to double that allowance.
Never stand or kneel on the sheets. Work from a ladder or a plank across the rafters, and fit them on a calm day: a 4 x 10 ft sheet catches wind like a sail. The 8x12 uses 11 sheets, cut face by face in the plan.
Step 6: The vents
Ventilation keeps a sunny day from cooking the plants. The rule that UConn10 and Alabama Extension cite from ASABE is roof vents of 15 to 20% of the floor area, with side vents of the same size low down; Clemson1 describes the pairing, warm air out through the top and cool air in through the sides. The 8x12 gets 5 roof vents and 6 side vents.
Hang each lid on its hinges and fit the opener. Oklahoma4 State notes that automatic wax openers work without electricity, which is why our plans price one per roof vent. If you choose an exhaust fan instead, the plan sets it high on the back wall with a motorized intake shutter at the door end, and an electrician runs the outdoor GFCI circuit. The greenhouse ventilation calculator sizes both options for your floor.
- 1Clemson HGIC 1704 Clemson HGIC 1704, 06/99
- 4Oklahoma Cooperative Extension Oklahoma Cooperative Extension, HLA-6705, revised 03/2013
- 10UConn Extension IPM UConn Extension IPM (J. W. Bartok Jr., Extension Professor Emeritus), Natural Ventilation in Greenhouses, updated 2013
Mistakes that cost the most
Most failed DIY greenhouses fail in the same few places, and every one of them is avoidable with the rules above:
Mistakes in the structure
- A base that is not square. The sheets are factory-square; the frame has to match. Fix it at step 1, when it costs nothing.
- A roof that is too flat. Palram asks for at least 2 in per 12 in, and its technical guide explains why: slope reduces the dirt that collects on the sheet and lets condensation drain down the flutes by gravity.
- Supports too far apart. The spacing of rafters, purlins and girts comes from the sheet maker’s load tables for your snow and wind. Wider spacing puts the sheet outside the loads its maker rates it for.
Mistakes in the glazing
- The UV side facing in. Only one face carries the UV protection, and the sun has to hit that face. Palram’s instructions say to install the panels with the label side toward the sky: read the label before you peel the film.
- Tapes swapped or left off. The vented tape belongs at the bottom so condensation can drain out of the flutes; solid tape there holds the water in, and an open top edge lets dirt and insects in.
- Holes the same size as the screw, or screws driven tight. The sheet grows and shrinks with the temperature; without room to move it cracks around the screws.
Mistakes in the climate
- Too little vent area. With one small roof vent, a sunny day can push the inside well past the 85 F that UGA Extension gives as the maximum in most situations. Size the vents to the floor, or fit a fan sized to the volume.
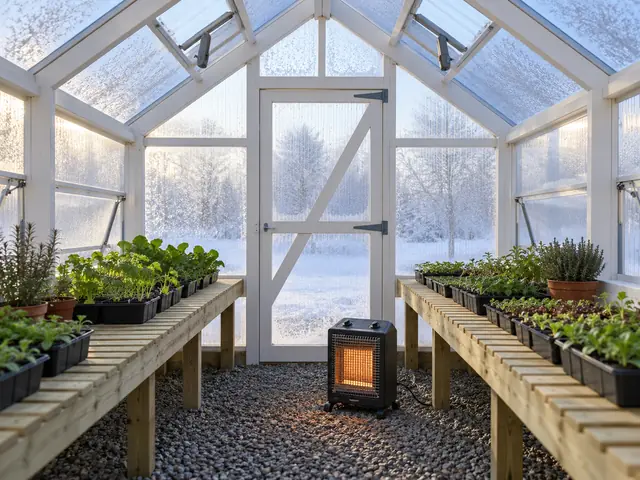
- No plan for winter. If you will heat, choose the glazing with the heater in mind: single-layer panels lose about twice the heat of twin wall.
- 2UGA Extension UGA Extension, B 910, 2023-11-17
- 7Palram Palram, SUNLITE Plus Installation Instructions for Greenhouses, 2021
- 8Palram Palram, SUNLITE Technical Guide, 07.2019
- 9Palram Americas Palram Americas, SUNLITE, Form 1211 032626, 2026
What it costs to build
The 8x12 comes to $3,813.80 in priced materials, plus an estimated $56 to $186 of gravel, before tax and freight. If you hire the work, published carpenter and handyperson rates of $50 to $100 an hour times our build hours give $2,300 to $6,600. The whole list, line by line with store and date, is in the greenhouse cost calculator.
Size the rest with the free tools
After the build
A greenhouse built this way is ready for its first season the day the last lid closes. Two jobs remain before winter: decide the floor (UGA2 Extension lists gravel, cinders, crushed stone, concrete or brick) and, if you will grow through the cold months, size the heat with the guide to keeping a greenhouse warm in winter.
- 2UGA Extension UGA Extension, B 910, 2023-11-17
Sources
Every number in this guide that does not come from our own greenhouse designer was checked against these 10 documents, numbered in the order the text first cites them and read between Oct 10, 2026 and Oct 13, 2026. 10 are extension services, codes and makers.
- 1Clemson HGIC 1704Clemson HGIC 1704, 06/99
- 2UGA ExtensionUGA Extension, B 910, 2023-11-17
- 3NRAES-33NRAES-33, Greenhouse Engineering, 1994
- 4Oklahoma Cooperative ExtensionOklahoma Cooperative Extension, HLA-6705, revised 03/2013
- 5International Code CouncilInternational Code Council, 2021 International Residential Code, Chapter 3, R317.1.2 (codes.iccsafe.org)
- 6International Code CouncilInternational Code Council, 2021 IRC, Chapter 1, R105.2 (codes.iccsafe.org)
- 7PalramPalram, SUNLITE Plus Installation Instructions for Greenhouses, 2021
- 8PalramPalram, SUNLITE Technical Guide, 07.2019
- 9Palram AmericasPalram Americas, SUNLITE, Form 1211 032626, 2026
- 10UConn Extension IPMUConn Extension IPM (J. W. Bartok Jr., Extension Professor Emeritus), Natural Ventilation in Greenhouses, updated 2013